
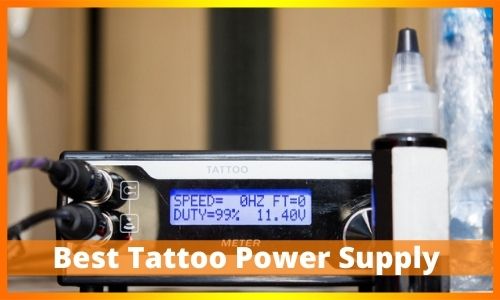
The working of a tattoo power supply can feel a little hard to grasp for most people. In simple terms, its job is to send electric power from the main source to the tattoo machine. With a good power supply, tattoo artists can adjust the voltage with ease. That gives them more control, more freedom, and a safer, more comfortable setup to work with. So today, let’s look at the types and settings of a tattoo power supply in a clear way.
Key Components:
To understand how the power supply is made and how it works, you first need to know its main parts. These physical and working parts help the device run well and do its job properly. Once tattoo artists understand these parts, the whole setup becomes much easier to use.
Main Power Switch:
This switch turns the tattoo setup on and off. You do not need to unplug every cable just to stop the power flow. Just switch it off to cut the current, and turn it back on when you are ready to work again.
Voltage Control Dial:
The voltage control dial is used to change the voltage in the tattoo setup. Artists can raise or lower the power by turning this dial. Some power supplies use a manual dial, while others use buttons to make the change.
Voltage Display Screen:
You can change the voltage with the dial, but you still need a screen to check the exact level. That is why many tattoo power supplies include a voltage display screen. You may find either a digital display or an analog one, depending on the model.
Dual Switch Connection:
Some tattoo power supplies come with a dual switch connection. This lets users connect more than one tattoo machine or support device to the same setup. A few models also make switching the power between machines much easier.
Duty Cycle Ratio:
The duty cycle ratio shows how much of the time the tattoo machine is actually working. In most cases, a 50 percent duty cycle is considered ideal. The power supply usually calculates this while the tattoo setup is running.
Optimum Voltage Rate:
The optimum voltage rate is the voltage range that works best for tattoo machines. It usually falls between 4 volts and 12 volts. Changing the voltage can affect the speed of the machine. Still, many experts suggest using 8 to 10 volts for the best results.
Important Terms to Know
There are two terms you will hear often. It is good to know what they mean.
Duty Cycle: This is mostly for coil machines. It shows the rhythm of the machine. It tracks how long the machine is “on” during one tap. For a smooth shader, you want this number near 50%. If you use a rotary machine, you do not need to worry about this.
Optimum Voltage Rate: This is the “sweet spot” for your machine. Most machines run well between 4 volts and 10 volts. If the voltage is too low, the needle will snag. If it is too high, it will hurt the skin. Start at 6 volts and adjust from there.
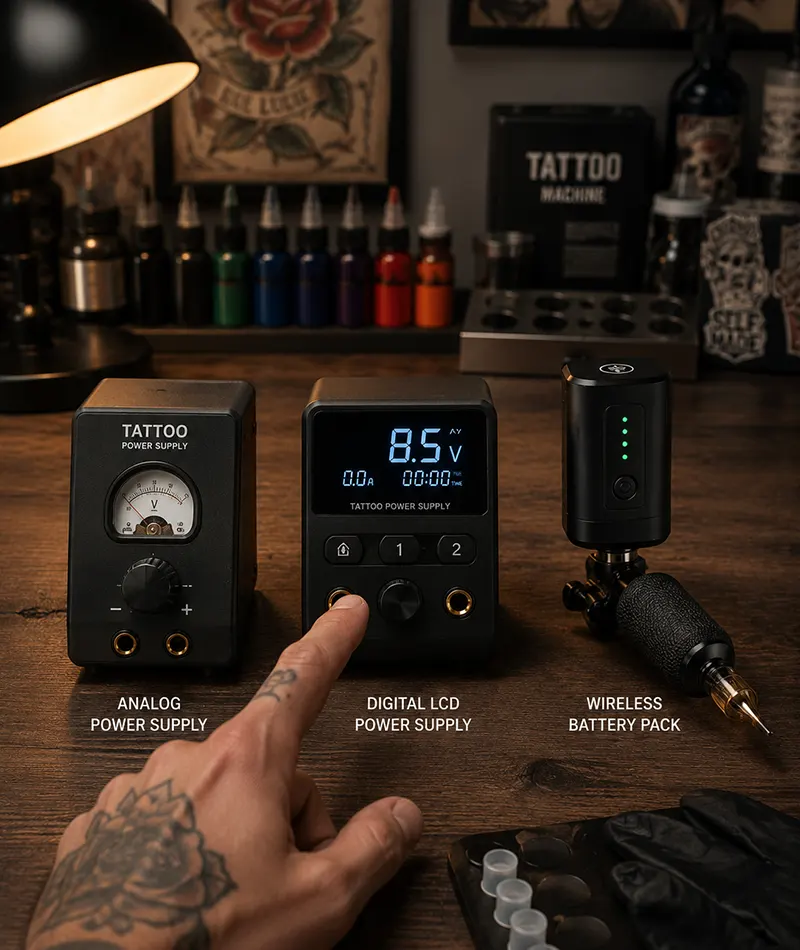
Types Of Tattoo Power Supply
There are three main types of power supplies. Each one has a different job.
- Analog Units: These are “old school.” They use a dial and a needle to show power. They are tough and last a long time. But they are hard to read quickly.
- Digital Units: These are the most common. They have a bright LED screen. They show you the exact voltage number. This makes it easy to set your machine perfectly every time.
- Wireless Battery Packs: These are very popular now. You do not need a cord or a foot pedal. The battery plugs right into your tattoo machine. This lets you move freely.
Simple Voltage Cheat Sheet
New artists often ask, “What voltage should I use?” Every machine is different. But you can use this simple guide to start.
- Rotary Machines: 5 to 9 Volts.
- Coil Liners (for outlines): 7.5 to 8.5 Volts.
- Coil Shaders (for filling): 6 to 7.5 Volts.
> Tip: Always start with low voltage. Turn it up slowly until the ink goes in smoothly.
How to Set Up Your Power Supply
If you are just starting out as a tattoo artist, this part may feel a bit confusing. Tattoo tools can seem tricky at first. Still, there is no need to stress. We have put together a simple guide to help you understand the settings of the power supply. Read these steps, and the whole process should make more sense.
First, go through the manual that came with your tattoo power supply. If it was not included in the box, look for the right manual online. This gives you a basic idea of how the power supply works.
Make sure the power supply is connected properly to the main power outlet. That is important for safety and for professional work. It can also help you avoid problems during a tattoo session.
Once the power supply is connected, move on to the tattoo machine. Plug it into the correct slot on the power supply. Using the right connection point matters for proper function.
Next, connect other support tools, like the foot pedal, to their matching ports. At this point, your tattoo setup should be ready to go.
After everything is connected, you can begin your tattoo session.
To check whether the setup works, press the foot pedal. This should make the tattoo machine start running. If everything feels smooth and accurate, you are ready to begin tattooing.
FAQs:
1. Should I use a higher voltage for lining or shading?
You should use a higher voltage for lining.
Lining: Higher voltage makes the needle move faster. This gives you a quick, clean hit. It helps create crisp, sharp lines that do not blur. (Try starting at 7.5 to 9 Volts).
Shading: Lower voltage makes the needle move more slowly. This gives a softer hit. It allows you to build up color slowly for smooth shading. (Try starting at 6 to 8 Volts).
2. Can using the wrong voltage damage my skin or the machine?
Yes, it can cause problems.
For the Skin, Voltage that is too high can cause too much trauma. This can lead to slow healing, pain, and “blowouts” (where the ink spreads under the skin).
For the Machine: Running a coil machine at a very high voltage for too long can cause the coils to overheat. This can wear out your internal parts faster.
3. Why do some power supplies have dual ports?
Dual ports (or “dual switch connections”) let you plug in two tattoo machines at the same time.
This is a huge time saver. You can set up one machine for Lining and the other for Shading.
You use the power supply’s switch to jump between the two machines instantly. This means you do not have to stop and change cords during a tattoo.
4. What is the difference between Amps and Volts?
Think of electricity like water flowing through a pipe:
Volts (Voltage): This is the pressure of the water. It controls how fast the needle hits the skin. This is what you adjust the most.
Amps (Amperage): This is the volume or amount of water flowing. If you use big needles (like a large magnum), you need a power supply with high Amps (2 Amps or more) to give the machine enough “muscle” to push the needles.
Troubleshooting:
This is one of the most common issues! The problem is usually not the power supply itself. It is often a faulty connection.
| Problem | Likely Fix (Check in Order) |
| Machine cuts in and out when you move it. | The Cord: Your clip cord or RCA cord is likely damaged or has a loose wire. Try a different cord. |
| Machine stops and needs a “flick” to start (coil only). | The Contact Screw: The screw is worn down or needs a small adjustment. Adjust the gap slightly. |
| Machine runs hot and loses power. | Voltage Too High: You are asking the machine to run too fast. Turn the voltage down and check your needle depth. |
| Power supply screen is blank. | The Charger/Outlet: Unplug the main charging cord from the power supply and plug it back in. Make sure the wall outlet is working. |
Conclusion
Understanding the types and settings of a tattoo power supply is not always easy. It can be confusing at first. But experts have made the basics, the types, and the working process much simpler to follow. We went one step further and gathered the key details in one place. Hopefully, that cleared up your questions and made things a little easier. You can always get more help from professional tattoo artists and experienced experts. Thanks for reading.
Leave a Reply